M’s Gnocchi Recipe

M makes a mean gnocchi. She sent the recipe to some friends recently and I offer it below for your edification:

Gnocchi Directions: (6 adults)

Boil 4 pounds potatoes (I use Russets but Marcela Hazan – my Italian food queen says “boiling potatoes” not “new potatoes” I don’t know what that means so I do russets which she says are too mealy) – with their skins on.  Try not to fork them too much (you don’t want water to get in the potatoes) but when they are done remove and while still hot put through the Potato Ricer.   Once done put them through potato ricer a second time.  While still hot (I don’t know why this is important, but my aunt says it is) add four cups of flour, a little parmesan, salt and one egg and knead till mixed through but don’t handle too much.  If it is sticky add a bit more flour.  Better for it to be on the wetter side because when you are rolling it out you can add more flour – but you can’t make it moister!
Roll out and cut into one inch pieces.  The traditional way to do it is to then roll them down the backside of a fork to make a little divet in the middle and stripes on the back (you could google this part if you like).  I have found if it does add more space for sauce but if you are pressed for time or dealing with kids it isn’t vital.
Sauce we made (cut down ingredients if you don’t want so much!)
4 slices of pancetta (1/2 inch thick) cut into bean size bites
4 heads of garlic (pressed)
4 heads of escarole
2 large jars of tomatoes (get the DOC san marzano whole tomatoes in their own juice)
red pepper (if your kids can handle it)
sautee pancetta until golden, add garlic, sautee for a few minutes, add escarole, sautee for a few minutes, add tomatoes (and red pepper if you like) simmer for 30 min.  You probably won’t need salt because of the pancetta.  If the tomatoes aren’t really vibrant you can add a little red wine vinegar and a touch of sugar (which will give it a little boost).   Whenever making tomato sauce the only real rule is to never cover it (because you are cooking down the tomatoes and you don’t want to add water.)
And the cookbook I love for italian cooking is: Essentials of Classic Italian Cookbook (Marcela Hazan)
Cheers!

DIY Seltzer Water

[youtube]http://www.youtube.com/watch?v=4AQi9x_Ueho[/youtube]
M returned from Philly this weekend with a 15lb CO2 tank. We hooked it up to the regulator, hose (with ball lock), and “carbonator” cap that I got from Northern Brewer and it worked great. From construction to carbonation took about 10 minutes. Video is here.

The set up is basically the same as this one. I set the regulator to 40psi, but I’ll experiment with other settings.

The steps are this: take a 3/4 full bottle of chilled liquid, attach the ball-lock cap, evacuate the air, connect to the hose, apply pressure, shake like mad, drink.

In this case I carbonated water and pomegranate juice. It’s really tasty and quite cost effective ($.01 for the water, $.02 for the CO2, and $2.50 for 1/2 liter of Georgian pomegranate juice that I get across the street). We plan to experiment with other juices and kefir d’acqua that M makes.

Update: I used way too much pomegranate in my first experiment. Subsequently I tried it with just a couple of ounces of juice and it’s much better.

The Power of Beer

I have been searching (albeit not very intently) for “Bierkraft” in Park Slope for about two and a half years. Well, it’s where it apparently has been the whole time: at the corner of 5th and Union. It’s a nice little shop that’s devoted 50-50 to beer and food (cheeses, meats, chocolates, cookies, etc). At the back of the store they have a selection of beers on tap, which they will kindly put into a growler in exchange for a large number of American greenbacks. It took quite a while to get my Kelso Pilsner (which, they neglected to tell me, is from Brooklyn), partly because they pressurize the growler to 18psi before filling it. With this system the beer is transferred from keg to bottle without “being poured” so it doesn’t lose any of its carbonation. Sounds hokey, but it tastes good.

Brooklyn Pizza Tour

My friend Chris was in town from Cambodia this weekend so I planned a Pizza Tour of Brooklyn. Of the places on the map, we hit four (plus we made our own home-made pies).

We had two categories for the pizzas we sampled: “paper plate” and “gourmet”. The former were slices, the latter where what our friend Deana would call “not pizza” (since it’s too thin and froo-froo).

First stop: Pizza Plus at 359 7th Ave, Brooklyn, NY 11215, (718) 768-5327. The “local” pizzeria. This is where I buy fresh dough as well as an occasional slice or entree. Pizza Plus is one of the friendliest eating establishments in Park Slope and they make a really nice slice. We each had a half slice on a paper plate as a reference point and appetizer before hopping on our bikes. Pizza Plus still charges only $1.75 for one slice, plain cheese pizza.  An 18″ pizza goes for $14 or $.05/inch. Crisp crust, excellent sauce, “too much cheese”.

Next stop: Franny’s Pizza at 295 Flatbush Ave, Brooklyn, NY 11217, (718) 230-0221. Franny’s is a decided step up from your average pizzeria. The bartender was attentive and the pizza was very good, but pricey. We enjoyed the tomato and buffalo mozzarella pizza (which cost $16 or $.14/inch). The sauce was good and the crust had a nice chewiness, but it did get a little waterlogged and there was a bit of char (which is not unusual at brick-oven pizzerias, read: “Anthony’s on 7th Ave”). Overall Franny’s serves a solid gourmet pizza.

After Franny’s we coasted down 4th Ave (passing many other storefront pizzerias) to Peppe’s, a newcomer to the neighborhood, at 597 4th Ave, Brooklyn, NY 11215, (718) 788-7333. Though we had slices on paper plates, Peppe’s pizza is definitely high-end. There was a generous sprinkling of Romano on top, which lent the sauce a creaminess that took some getting used to. Peppe was gregarious and he stopped to chat with us between deliveries. An 18″ large pie costs $16 ($.06/inch) making Peppe’s the value winner. (Read a serious review).

Our final stop before returning home to try our own hands at pizza-making was Toby’s Ale House at 686 6th Ave, Brooklyn, NY 11215, (718) 788-1186. Toby’s just opened up a few weeks ago, but already they’re churning out excellent pizzas. Our group had grown to five at this point so we sampled three of their pizzas. Toby’s pies are small and priced similarly to Franny’s so bring lots and lots of cash. Though all of the pies were too salty, the buffalo mozzarella pizza was the taste winner in the gourmet category and it goes quite well with their Toby’s Cheap Ale (which, at $3 a pint, is cheap indeed).

A couple of hours later and many dollars lighter, we trekked back to 7th avenue and made some pies of our own. I put together two 14″ pies for under $20, which puts the home-made-pizza-price on par with Peppe’s (though mine did use fresh mozz and included spinach). My pizza was decidedly blander than the others and had a sweeter tomato sauce since I use canned crushed tomatoes alone. The addition of spinach and subtraction of salt make this pizza the health-conscious pizza-eater’s choice, which met with general approval from the judges. However, with Peppe’s in the neighborhood, it’s going to become harder and harder to fire up the “Mark Royal” and make it myself.

Update: 7/19/08. M and I went to Di Fara’s today. What you’ve heard is true. The pizza may be the best in the world. The ingredients are top-notch and the place… well, let’s just say it’s hard to describe.

Beeby’s Broth

I was listening to a podcast of Science Friday the other day (yes, I am a nerd), and Michael Pollan was on talking about his new book In Defense of Food. He actually came across as a reasonable fellow in the interview — all of the other press I’d heard about the book made him sound like a very unreasonable, local-only-organic-granola freak. During the show a whacko caller mentioned something called “Bieler’s Broth“, which I vowed to try next time I was feeling under the weather. Well, today is the day.  I made a slight variation on the recipe linked above:

Beeby’s Broth

  • 1 cup water
  • 2 cups green beans
  • 3 cleaned stalks celery
  • 2 zucchini
  • 1 handful parsley 
  • 1 tbl sp olive oil
  • 1 pinch salt
  • a touch of hot sauce

Bring the water and salt to a boil and steam the beans for 5 minutes. Chop the celery and zucchini and add to the pot. Cook for an additional 5 minutes (or until all of the vegetables are tender). Pour into a food processor and puree. Add the parsley and olive oil. Puree the hell out of it. 

The result isn’t the best tasting recipe in the world, but it’s a lovely green color when it’s done and I get the feeling that it’ll do great things for me. The consistency isn’t what I would call “pea soup” because the parsley is still rather crunchy.  Try at your own risk.

DIY Lunchmeat

This may be a dumb post for anyone who’s ever cooked before, but it’s amazing how simple, cheap, healthy, and tasty homemade lunchmeat is! M got a turkey breast at the co-op on Tuesday, which I roasted today with a bouquet of thyme and a slab of butter. After two hours baking and an hour resting, I sliced half of it for sandwiches (pictured here). It’s an easy week’s-worth of sandwich fixings for about 1/3 of the cost of those watery, nitrate-packed deli counter meats.

Applewood at Home

I invited David Shea, owner and chef of Applewood, to come in to our home and conduct a cooking lesson with M for her birthday. It was a great two-hour lesson. David was very laid back and taught M a lot of good tricks. We had striped bass on creamy polenta with orange/grapefruit supremes salad and jalepeno/onion relish. The ribeye was served with cruchy kale and onions with a beurre fondue. More photos.

McCann’s Oatmeal

IMG_3110Best breakfast, ever!  It takes a while to make but these steel cut oats taste great.  Modified recipe: 1 part milk + 1 part water + 1 part oats, heat to boil then simmer, add brown sugar or honey to taste.

Beer Can Chicken

IMG_3015Aside from grilling pizza recently, I’ve also enjoyed making “beer can chicken”. It’s the easiest to make and best tasting chicken you’ll ever have. Normally, when I roast a chicken in the oven, I have to flip it over at some point and, invariably, the skin sticks to the pan. Standing on a beer can on the grill, it cooks evenly, especially the dark meat down below, which gets a bit more heat. Recipe: wash/dry/salt/pepper/fridge bird. Set grill up for indirect heat (shuffle the coals off to both sides and lay a drip pan or tin foil trough at the bottom of the grill. Drink half a Bud and insert into the chicken’s cavity. Stand the bird up on the grill using it’s legs and the beer can like a tripod. Cover. Grill for an hour or so until done.

Alaskan Salmon

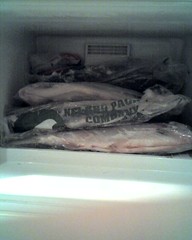
08-13-07_2243C came back and brought a lot of fish. This is a picture of the fish in a freezer. That’s a s-load of fish, eh?