I am a cheapskate. I, especially, don’t like overpaying for mobile phone and data service. The fees that carriers impose for on-contract smartphones are obscene. My recent iPhone service looked something like this before I cancelled it: $30 for 3G data + $20 for unlimited texts (more data) + $50 for a meager calling plan (even more data). Eventually, these high monthly fees forced me to take a look at other options. I’m happy to report that there are a lot of them and they’re pretty good, though you might have to make some concessions and tinker a bit to get things working properly.
Here are some of the assumptions that we’ll be working under in this article: you’re out-of-contract with your cell provider, you’ve at least sipped the Google Kool-Aid, you’re open to using an Android handset, you have access to an unlocked GSM phone (not required, but helpful), you’re OK with last generation’s 3G or 4g (read: non-LTE) data speeds, and you’re willing to use pay-as-you-go services (and, potentially, jump around a bit).
Google Voice
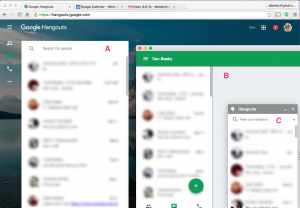
 The first thing you’ll want to do is migrate your current cell phone number to Google Voice, which is a painless process if you have a Gmail account and are out of contract on your current phone contract. Google Voice does a lot of cool things. You can fluidly set and schedule which phones should ring when someone calls your number (office?, home?, cell?, summer house?, mother-in-law’s place?). You can originate a call or send a text to any of your contacts directly from a browser and everything can be logged and annotated there. The best part is that you can use any cell phone number(s) you want and change it (them) on a whim. People simply continue to call your regular number (e.g. your “old” cell number) and your “new” phone rings — you can even configure it so that your outbound calls and texts use your Google Voice number regardless of the handset you’re using. The cherry on top: Google Voice can replace your cell service’s mediocre voicemail system, which, among other things, will email you a transcribed copy and a recording.
Google Voice on Android
Almost any Android phone can use Google Voice. In my experience this has been a completely seamless endeavor–it will take you longer to read this paragraph than it will to set it up. Install the Google Voice app (not the Google Talk app, though you might want to install that too). In Google Voice open the settings menu and under the “making calls” menu tick the box next to the “Use Google Voice to make all calls” option. Save. That’s it. When you use the phone’s native dialer all calls get routed over Google Voice.
Google Voice on iPhone
This is a little trickier. There is also a Google Voice app for iOS, but it’s not as tightly integrated as it is on Android. In essence, you use the app as a text messaging client and dialer (rather than simply using the native dialer, you dial a number using GV’s interface). When you place a call in Google Voice your phone rings and only after you answer the call does it ring with the person that you’ve dialed. Google Voice acts as the call’s broker by making two calls (one to you and one to your friend) and creating a handshake between them.
Google Voice Caveats
Google Voice uses data for all of its services. Texting happens over Wi-Fi or cellular data so when you have spotty data coverage (e.g. roaming or 2G data) it can be a bit dicey sending and receiving texts. The handshake that occurs when you make a call also requires a data connection, though the calls themselves happen on the cellular voice network so they clock real phone minutes. In a pinch you can always disable GV on your phone and send a message from your phone’s native text client and phone number. In this case your friends and family might not recognize the number (as you never handed it out), which can lead to some confusion or unanswered calls.
Choosing a Handset
You’ll probably want to use an unlocked GSM handset.
If you use an iPhone (on any GSM, aka non-Verizon/Sprint, network), call your provider today and ask them to unlock your phone. They will likely do it for you for free–it is perfectly legal and you are within your rights to ask (especially if you’re out of contract). A factory unlocked handset is a good idea for two reasons: it increases the resale value of your device and it allows you to use your iPhone on any domestic or international GSM network.
 Though I was a long-time iPhone user, I was willing to try Android. So I bought the Galaxy Nexus “Google Phone” (technically the I9250 or the GT-I9250TSGGEN) directly from the mothership. The unlocked handset costs $349, which (granted) is more than most phones if you ignore the on-contract pricing schemes that the cellular companies use, which I didn’t (more below).
If you decide to go the craigslist route, be careful. You’ll probably find many handsets that are locked to a specific network, which you’ll want to root and unlock. Even if you do this, remember that the phone probably doesn’t have all of the radio bands at its disposal that you might need. Be sure to check that the phone you buy/root/unlock is compatible with and uses the data bands of the services and plans you intend to use. What this means in practice: if you get a T-Mobile plan using an unlocked AT&T iPhone, you might find that you only get Edge data, which is basically useless for all intents and purposes. Sprint and Verizon iPhones use CDMA radio technologies (e.g. they don’t use a GSM SIM card), so they won’t work at all in this scheme. If you intend to leave the phone locked to its parent company and use a pay-as-you-go service from the same company you should be fine (but your plan options become much more limited).
Choosing a Plan
 When you have an unlocked GSM phone, you’re free to choose nearly any SIM-card based monthly or pay-as-you-go plan from any cell phone company. The GSM Galaxy Nexus is a nice option because it has radio bands for many 3G (and 4G/HSPA+) networks. I have mostly used T-Mobile’s $30/mo 4G (HSPA+) plan (here’s a great write up about it and the Google Galaxy Nexus combo) though I have had to fall back to a $40/mo AT&T voice/3G data plan from time-to-time (e.g. when I’m in northern Michigan where T-Mo’s coverage is non-existant). Each of these plans has its own phone number, but it doesn’t matter because no one sees those numbers–all calls/texts go through Google Voice.
One of the best features of the stock Android OS is that you can use the phone as a Wi-Fi hotspot. This may violate the terms of your monthly service, so exercise caution, but if you’re on the go and want to stream a few songs on your iPad or download a file to your laptop, an HSPA+ data connection piped though the phone-as-WiFi-hotspot is more than ample to handle the task.
Keep in mind that these cheapo monthly plans skimp on some frills like data roaming. In my case, this meant that the T-Mobile $30/mo plan was essentially useless in northern Michigan since I got little-to-no coverage north of Grayling and Google Voice relies on a data connection to send texts and initialize calls.
It’s Not Perfect. “Switching” to Republic and FreedomPop.
Being limited to 100 minutes on the $30/mo T-Mo plan wasn’t great. I found myself calling folks back on another line if I knew the call would last more than a few minutes. Most months I was able to stay below 100 minutes, but if I didn’t have a few dollars clanging around in my account (T-Mo charges .10/min when you go beyond the 100 minutes), the phone simply wouldn’t make or receive calls if I exceeded my allotment. I found myself relying on VOIP solutions (more below), which can be a bit wonky. The data and hotspot sharing were excellent–I was able to stream music, video, or radio in the on-the-go and never worry about data overages. I still have the Google phone and I use it in an ad-hoc manner on a month-to-month basis whenever I want that sort of service.
For the time being, though, I’ve decided to supplement my voice/data options with yet another phone — this one is from Republic Wireless (which is still in beta). For the bargain basement cost of $20/mo I get “unlimited” text, calling, and data. The air-quotes are around the word unlimited because most of the calling and data actually occur over Wi-Fi–the main stipulation of Republic’s service is that you must have Wi-Fi at work and at home. Not a problem for me.
Republic offers only one phone: a Motorola handset that runs a (cyanogenmod-based) version of Gingerbread (2.3.7). It’s not the fastest or freshest handset and the on-phone storage capacity is abysmal, but it gets the job done (and setup with Google Voice is, again, seamless). Because the software is locked, it’s not possible to use the Republic phone as a hotspot. Enter: FreedomPop.
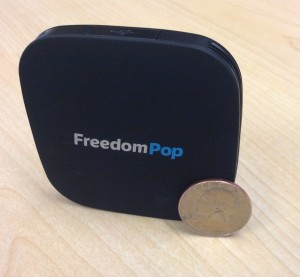 FreedomPop offers 500MB of “free” monthly data and “free” hardware. All of the air-quotes mean more stipulations, of course (e.g. if you go over 500MB, they charge you $.02/MB). Regardless, this free service offers double the data that most providers charge ~$20/month for on their basic plans. The cute little “FreedomPop Photon” hotspot requires a $90 deposit. It works as advertised and will connect up to 8 devices simultaneously. Why anyone would order an iPad with 3G data is beyond me when Freedom Pop’s Photon is on the market.
UPDATE: FreedomPop sort of sucks. They automatically recharge your plan in $10 increments using the credit card on file if you begin to approach your 500MB limit. So, this means that they charge you for data that you won’t use (e.g. beyond the 500MB) rather than for the data that you do use. If you disable the automatic recharge “feature”, then this remains a viable backup data solution (just don’t use it for Netflix, like I did).
UPDATE2: Freedompop sort of sucks even more. They have instituted a “floor” to go along with the “ceiling” mentioned above. Now if you don’t use at least 5MB of data, they charge you $1 to keep the account active. Again, it’s not a huge deal, but it’s another fee. In my case, my credit card had expired so when they tried to charge me the dollar maintenance fee, the charge was refused and my account was suspended. It took about a week and a half dozen emails to support to get it ironed out.
The VOIP question (Wi-Fi calls)
In any case, Voice Over IP (VOIP) is an excellent addition for cheapskates who are able to exercise the option. In a happy coincidence, the telecoms services that run my home and work numbers both offer free VOIP services, which has allowed me to use my numbers via a SIP client on my phone. While on Wi-Fi networks (basically anywhere in the world) I can make and receive calls from my home or work numbers as if I were sitting at my desk/on my couch. Additionally, my current cell phone provider, Republic Wireless, runs on a “hybrid” calling system, which works over Wi-Fi, so I can freely make and receive calls when I’m using any Wi-Fi data connection anywhere in the world. There are many, many VOIP/SIP apps and services. I’ve used CSipSimple, Skype, and Talkatone to name a few.
The Bottom Line: Total Cost of Ownership
Though on-contract phones seem cheap at the outset, the total cost of ownership over two years can be astronomical. Pocketnow reports that the iPhone 5 costs $1800 (at its cheapest) to $6000 (with the top-end phone and bells and whistles)! The two-year scenarios described above break down like this:
- Google Galaxy Nexus ($349) with T-Mobile 100 min & unlimited 4g ($720/2years): $1069
- Motorola Defy “unlimited” everything ($249) with Republic Wireless ($480/2years): $719
- FreedomPop ($90 deposit) with 500MB/mo ($0/2years) and random fees: $5.50
Even if I used both phones and the hotspot every month for two years ($1768), I would just begin to approach one iPhone (with very meager allotments) in terms of total cost.
Update 10/2013: I’ve been up to a lot of tinkering since last year:
- I tried TextNow (with both the Nexus S and Galaxy S III), but the voice service is entirely VOIP. Over Sprint’s network making calls is nearly impossible. The TextNow service also does not play nice with Google Voice. Non-starter.
- The Motorola Defy that Republic offers has become almost unusably slow. It got to the point that I never used the service. I will reinstate the service soon to take advantage of Republic’s new Moto X offering… I’ll get a $100 credit by sending in the Defy and then primarily use the $5/mo wifi only option unless I need to upgrade on a pro-rated monthly basis.
- Finally, I’ve switched off the T-Mobile $30/mo unlimited 4g plan and opted for $40/mo Solavei (T-mo MVNO) instead–the lack of roaming service on the $30/mo T-Mobile plan was a deal breaker.
- I’m curious about FreedomPop’s free service, but will wait to see what they come out with in terms of phones in coming months.


 I hope someday in the nearish future my child will want to ride a bike with me badly enough to necessitate the